
Setup Shopify
Step 1 – Installing the Stedger App
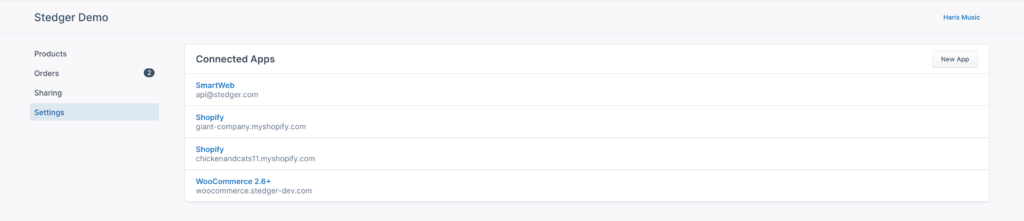
Click Setting in the left-hand menu
Click New App in the top-right corner
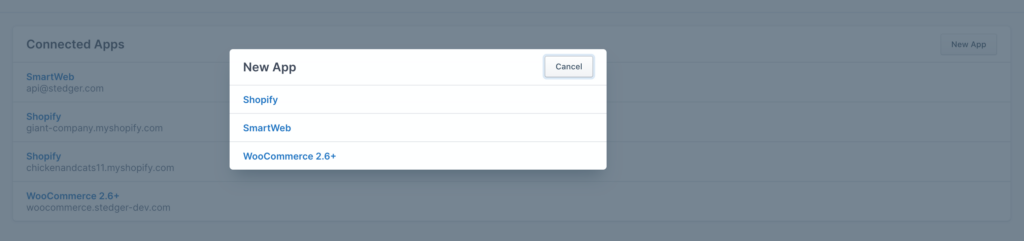
In the pop-up click Shopify

Enter your Shopify URL (your-name.myshopify.com) and click Setup App
Make sure you’re logged into your Shopify Account and accept the connection of the app
Step 2 – Setting up your Stedger account
Now it’s time to make sure Stedger runs like you want it to.
A. Auto-forward orders
Do you want to manually send order to the suppliers or have it sent automatically?
By enabling Auto forward orders, everything will be sent automatically and you won’t risk the supplier selling out the item before receiving your order.

Simply click Settings then click the selection bar and Save.
B. Auto price updates
You might want to change your prices depending on your suppliers’ current cost prices.
Click Settings then on your Shopify App.

In the next view you can select if your Prices and Compare At Prices should be updated when the cost of an item changes.
Click Save.

The Compare At Price is a “before” price whereas the Price is the current one. If an item has a Compare At Price, it is on sale.
C. Notification e-mails
You might want to get e-mail notifications based on Orders and Order Fulfilments.
Click your name in the top-right corner and then Profile.
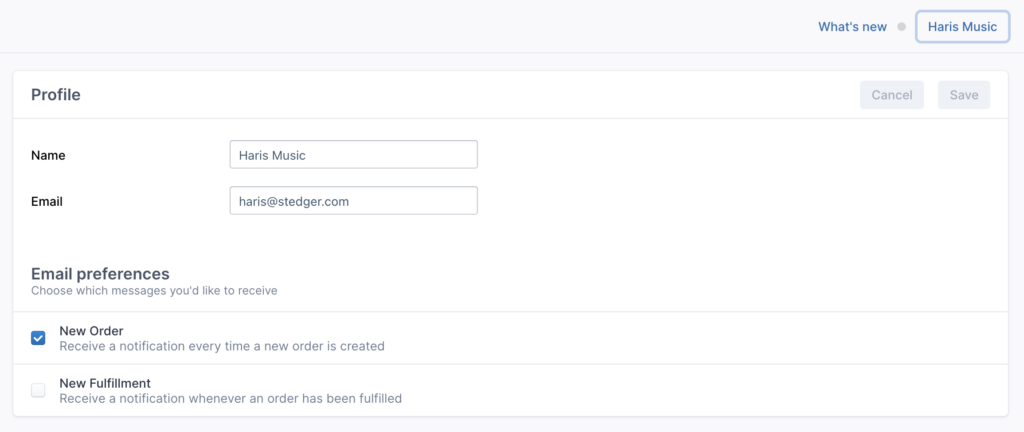
Select the notifications you wish to active and Click Save.
D. Shipping mapping
In order to match your customer’s preferred shipping option, you need to map your shipping options in Stedger.
Go to Settings in Stedger, and you will find this in the first settings block:
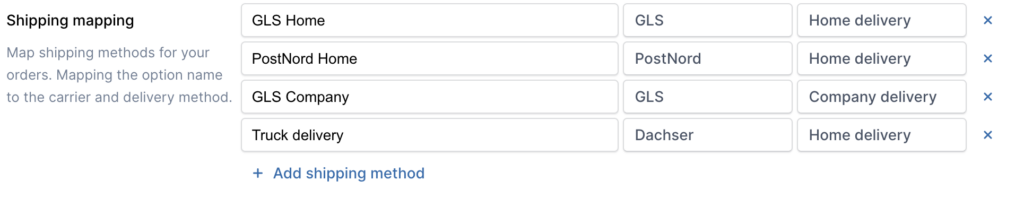
Simply input the exact title name of the shipping option from your shop.
Choose the corresponding Carrier and Delivery type in Stedger.
Click Save.
E. Setting dropship inventory in Shopify
Shopify allows you to have multiple locations and if you have something in different warehouses, this is really a good feature. Also, if you are dropshipping items from a supplier, but also have them in your own warehouse, it’s a good way for Stedger to automatically know how to handle the order.
It is also very important if you’re connecting a product through and don’t want to overwrite your own stock amounts.
Go to Settings in Shopify and click Locations.
If you already have a location that you want Stedger to update, skip this next step.
To create a new location, click Add Location.
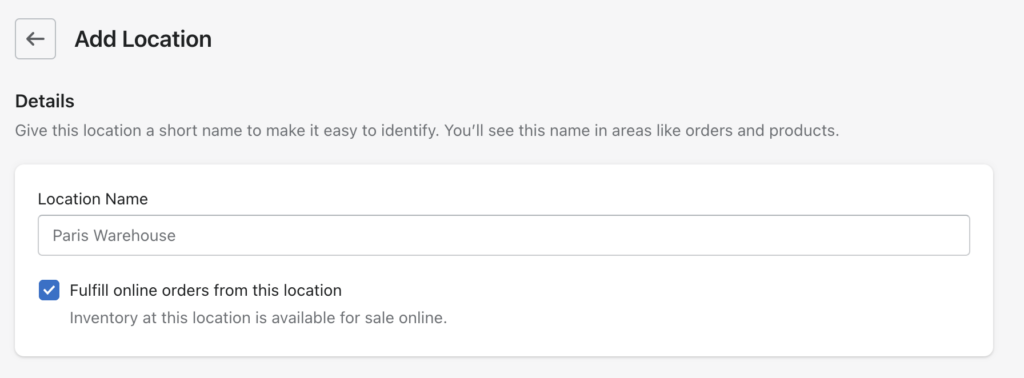
Make sure Fulfill online orders from this location is selected. Give the Location a name (the rest of the fields are not required to fill).

Click on the Location you wish to keep updated with the your Supplier’s inventory.
Copy the numbers from the URL – in this case 61011591246
Go to Stedger, then Settings, scroll to the bottom and click on Shopify.
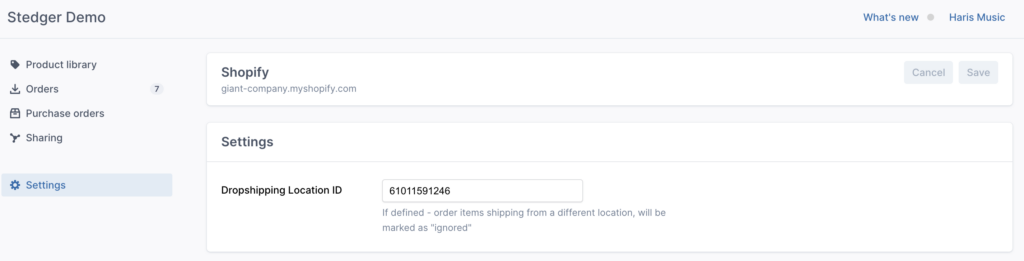
In the top, insert the Dropshipping Location ID that you copied from Shopify.
Click Save.
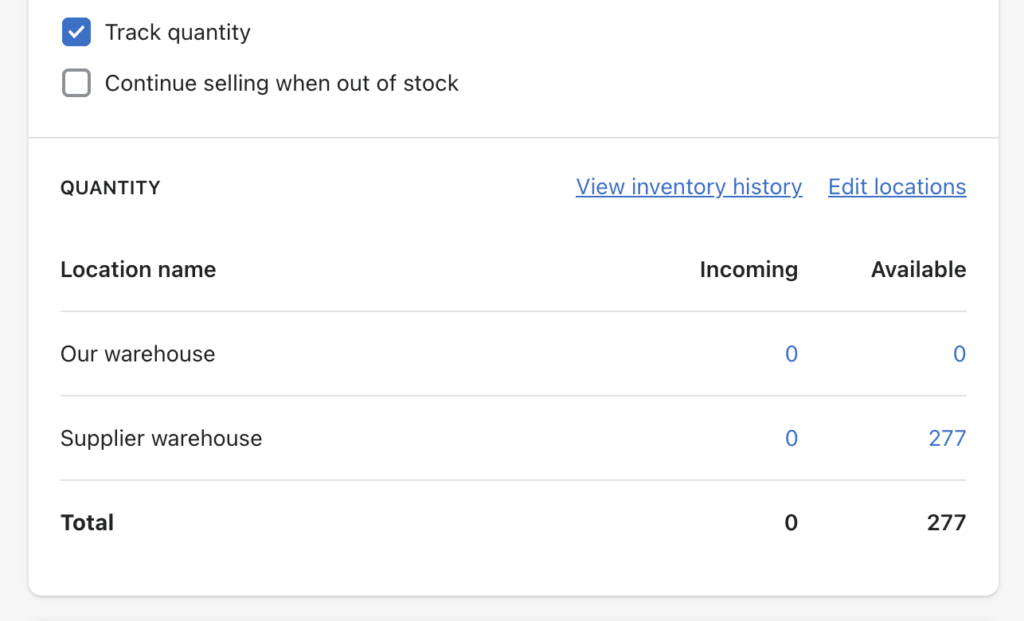
Now all products that are connected to a supplier through Stedger will show the updated stock amounts for the supplier’s warehouse as well as your own.
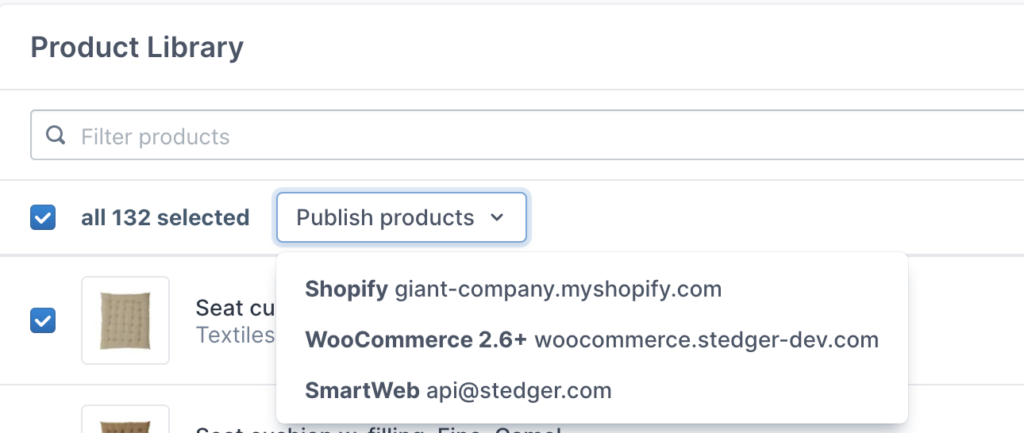
Step 3 – Choosing and Importing Products
Click Product Library and then Shared Products.
Select the products (or click the top box and select the whole page or all products).
Alternatively, search for a brand, model or type (or use the filters).
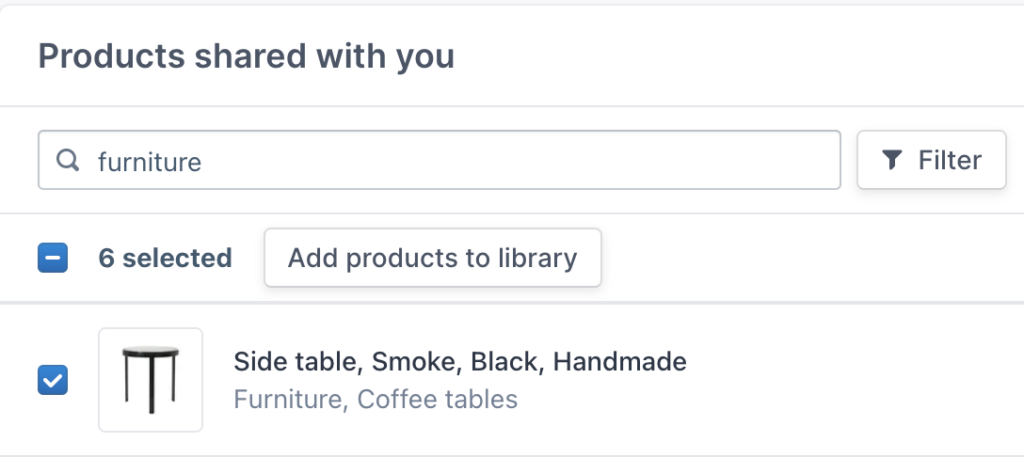
Click Add products to library.
In order to import the products to SmartWeb / ScanNet / DanDomain, Click Product library and again choose all or some of the products and Click Connect products.
The products are now in your Shopify store.
All you have to do now is to make them Available for sale in your store – enjoy!